Using the Tray Method
The tray method is one of the most well-known techniques used for growing sundews and other carnivorous plants. It is also, arguably, the one of the easiest methods for keeping the soil of your sundews or other carnivorous plants constantly moist. You will only have to fill up the trays once every 4-5 days if there is little to no air movement). This page will discuss the setup procedures, the benefits of the setup, and potential problems that arise. I will also explain the techniques I use to deal with these problems.Setup and Materials Needed:
(as well as important things to consider)
1. Supplementary Lighting
I
always recommend
growing sundews under fluorescent tubes to maximize the amount of light
your sundews will get. I usually keep the lights within 4 inches of the
sundews- it's hard to give them too much light. If available, use both
warm and cool fluorescent
tubes in each fixture to maximize the spectrum the plant receives.
(see my in-depth page about lighting for sundews.
2. Consider the area that you have to work with.(see my in-depth page about lighting for sundews.
If
you have a limited growing space, then a plant shelf by a window may
work best. In this case, you can hang 2-foot fluorescent fixtures
above each level. If you have room for a card table, you can have 2 levels of trays (see the pics below).
3. Determine what setup will work best
If you are growing your carnivorous plants in a room of your house that is infrequently seen by guests, such as a
basement, you can place your trays and sundews or other carnivorous
plants on a cheap card table. You may even be fine with growing them on
the ground. If the area is frequently seen, consider buying a table
that looks appealing to visitors, and that matches the decor of your
house.The key is to make the area look presentable :)
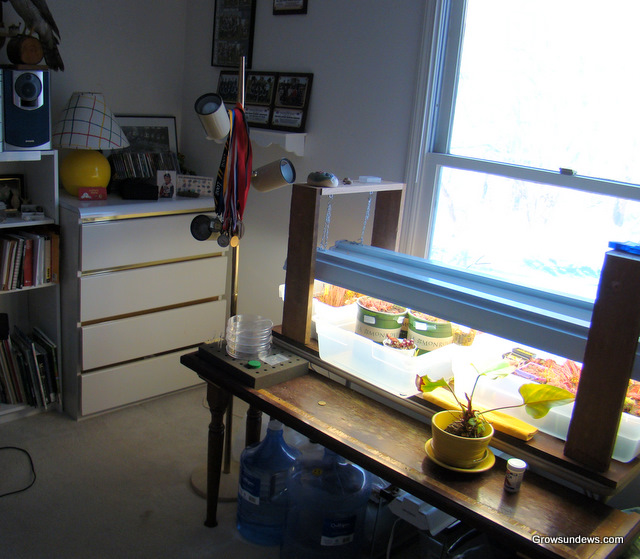
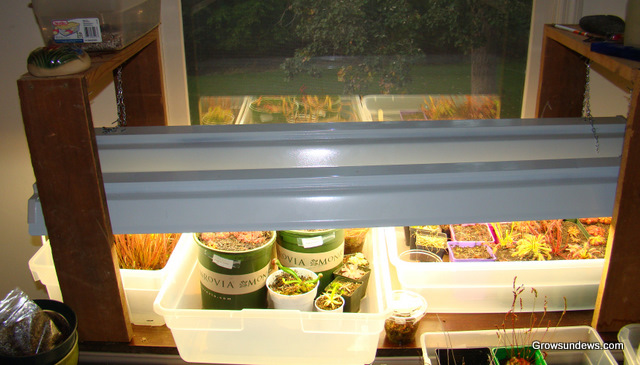
4. Plan how to hang up your lights if you are not going to use a plant shelfYou can use locker shelf stackers if
you don't enjoy building your own fixture-hanging device (see picture-
I built the wooden stands for my light). It is not too difficult to
build your own light stand, but it can be annoying if you don't have
the right tools (like a saw, etc.). Below is another picture showing the supports I built for my 4-foot fluorescent fixtures.
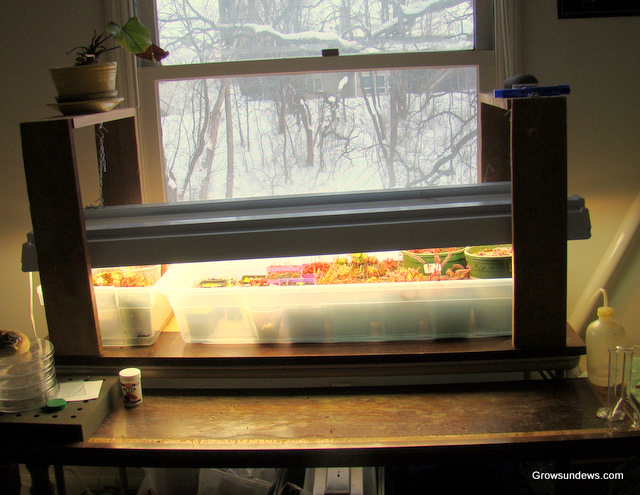
4-foot T-8 Light fixtures (raised up to see the plants)
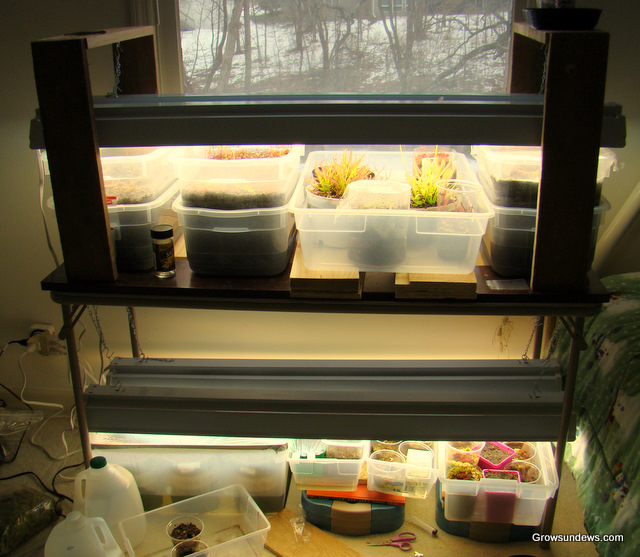
5. Purchasing your trays Depending
on the size of your growing area and light stands, you may need to use
large, medium, or smaller plastic "shoebox" sterilite containers There
is a large variety to choose from, as you can see by the picture below.
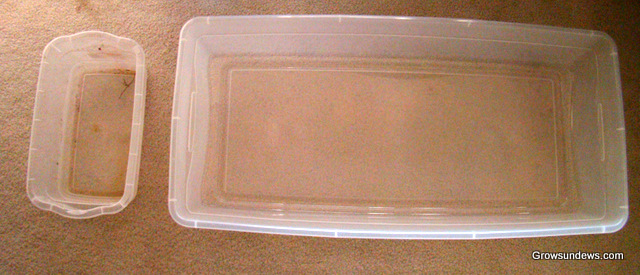
There
are many different sizes of plastic trays that you can use. To the above left
is a "shoebox" sterilite container and to the above right is a large 3 foot x
1 foot sterilite container.
6. Try to plant your sundews in square pots that are similar in height (not too important)
a. Square pots maximize your growing area in the tray
b. If you use a small pots for one sundew and a large pot for another, you may need to use more water in the tray, which could (very likely will not) rot out another of your plants in a smaller pot.
c. Consider the eye appeal factor. It definitlely looks better when you have uniformity versus sundews planted in a bunch of random pots.

7. Group your
sundews or carnivorous plants together in seperate trays, based on
their requirements for best results (not a must, but it certainly
helps).b. If you use a small pots for one sundew and a large pot for another, you may need to use more water in the tray, which could (very likely will not) rot out another of your plants in a smaller pot.
c. Consider the eye appeal factor. It definitlely looks better when you have uniformity versus sundews planted in a bunch of random pots.
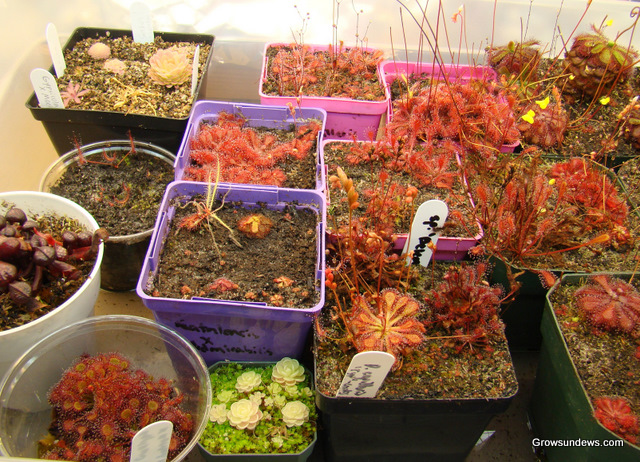
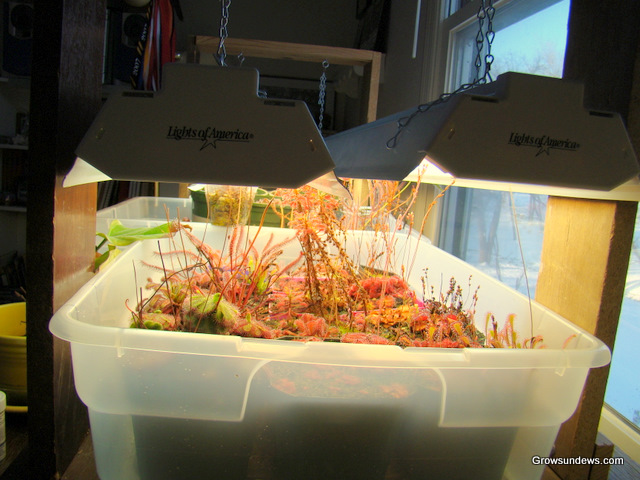
I
grow water-loving sundews, such as Drosera intermedia and Drosera
filiformis in a tray together with a 1-inch water level, but seperate
from my other sundews, such as the South African sundews, Drosera
adelae and Drosera spatulata together in the same tub, with a lower
water level (about 1/4 inch) because these sundews don't like as much
water as the "water-lovers". Below you can see that at one time, I had
three different trays to accomodate the different species and pot
heights I was growing at the time.
Potential Problems
1. Insects start to grow and reproduce in all of your pots
Always remember to first rinse your sphagnum peat before potting up your sundew in it.
The nutrients from unrinsed peat can encourage insect and algae growth. See my instructons about rinsing peat here.
You may want to let
the tray dry out between waterings. Very rarely (but common when I was
beginning), a nutrient-rich sundew pot may encourage bug growth. This can be caused
when a grower does not first rinse off the peat moss before planting
sundews in it.
2. Minerals and salts can build up on the surface of the pots in the trays, since water is constantly carrying these up to the surface of your pots due to evaporation.
Solution-Try to wash the trays out every 2 months or so to avoid alage and mineral buildup.
Be
sure to top-water your sundew pots several times as well, to flush the
salts and minerals from the surface. After a while of doing this, you
may only have to clean the trays out every 5-6 months if you use
reverse osmosis or distilled water.
Benefits
A story that shows how easy it is to take care of sundews when using the tray method (when the media is rinsed) is that I was away at college for 2 months at a time before going back home to visit, and my mom, who knows nothing about carnvorous plants filled up the tray twice a week. When I got back, the plants looked just as good as when I left! I owe my mom a million for making her do that. I do feel guilty :).
I have also made a self-watering system for the tray method that uses a 3-gallon Culligan water jug- I was able to leave my plants for 9 weeks unattended, and there was always a perfect amount of water in the tray (will post pics and explanation in the near future).
Using the Tray Method with your other Carnivorous Plants
Nepenthes
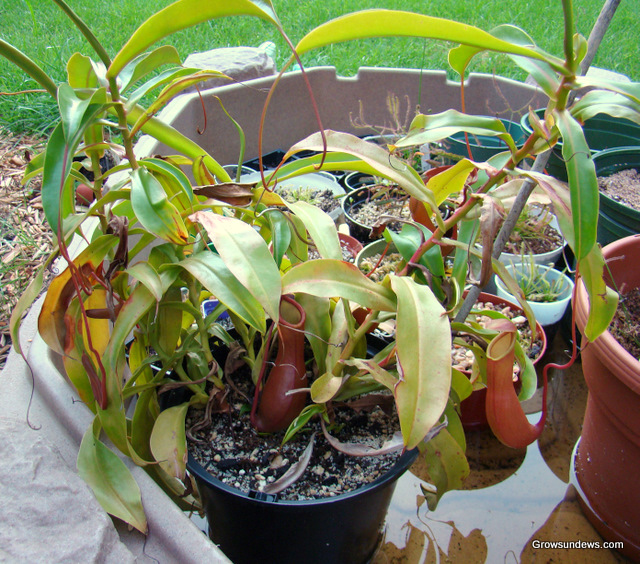
Although most growers don't recommend using the tray method for Nepenthes, I found that it worked very well as long as I used a pot that was at least 10 inches tall. Keep in mind that I only tried this on two easier species, Nepenthes ventrata and Nepenthes ventricosa. If you try this, I would recommend filling up the bottom half of the pot with a good absorbant medium, like peat moss. I used a ratio of 4 peat: 1 sand, and it worked well. Then towards the top half or 1/4, you can use your preferred Nepenthes medium. The only reason I say to do this is so that you have even absorption all the way up the pot. If you use different types of bark in such a tall pot, it will not be able to absorb as much water as your Nepenthes needs. See the picture below.
Pinguicula are can be grown most easily on the tray method. See this link to see a picture of pings growing happily alongside sundews in my largest tray.
Sarracenia
The tray method is one of the most commonly used ways to grow Sarracenia both outside and indoors. Sarracenia prefer taller pots that are constantly moist. Sarracenia Northwest recommends that you pack down your media as much as possible when potting up your Sarracenia.
Cephalotus
I have been able to grow my small Cephalotus plant on the tray method for the past 2 years. Once again, make sure that you have a tall pot, or else, you may run the risk of rotting out your Cephalotus. Pics:

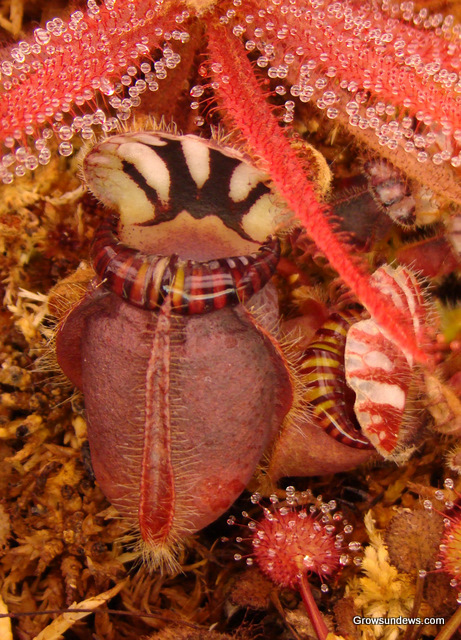
Above left: Cephalotus follicularis grown on the tray method in Charles Brewer's mix
Above Right: nectar forming on the lid of the first mature pitcher (in cooler temperatures)
Darlingtonia
Darlingtonia can be grown on the tray method, but some growers use pumps or other systems to keep the roots of their plants cool. I've grown mine indoors on the tray method (can be seen in this same picture but I didn't feed them, which caused the pitchers to gradually shrink over time, until I gave it away.
Utricularia
Utricularia are commonly grown using the tray method, since they always love being waterlogged. I compacted my media, to increase water retention, which has led to an infestation of Utrics in all my sundew pots!
Additional Questions or Suggestions?
Contact me at: sundewman(at)yahoo.com