Germinating and Growing Sundews From Seed
Growing sundews from seed is a somwhat slow process, but it can be very rewarding. The easier tropical and
subtropical Drosera can take anywhere from 1-6+ weeks to germinate,
depending on the species and the viability of the seed. For more difficult sundews
(such as tuberous Drosera), it may take more than 3 years for the seed
to germinate. Sundews can reach maturity much faster than most other
carnivorous plants as long as they are fed. Many Drosera species can grow to maturity in
only one year or less. Some species I've grown even flowered after only 3
months!
- To learn about cold stratification, click here to be directed to the article below
- To learn how to speed up the growth of your seedlings significantly, click here
- See the Table of Contents at the right of this page for further assistance.
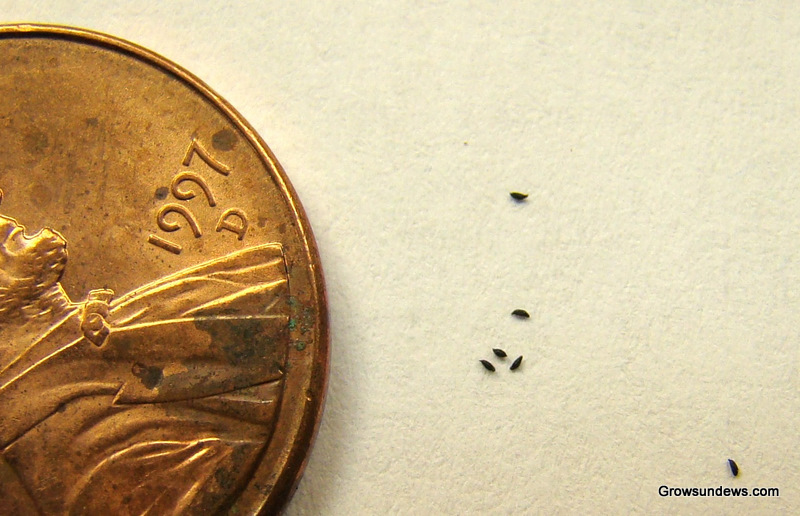
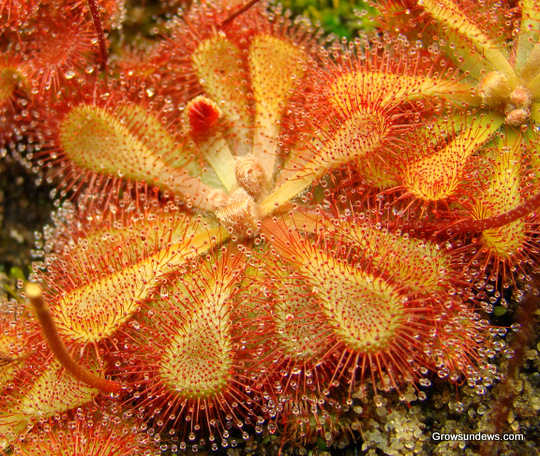
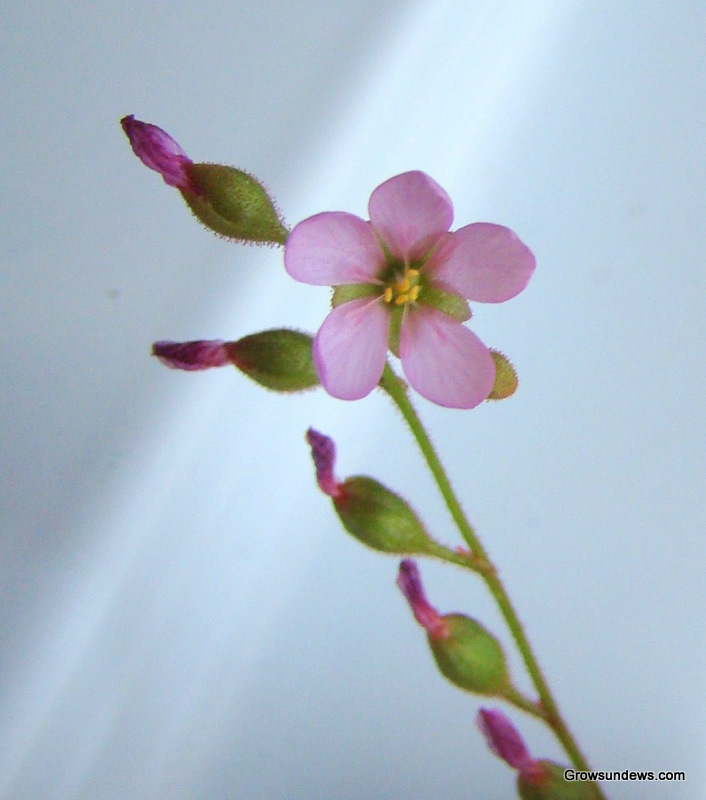
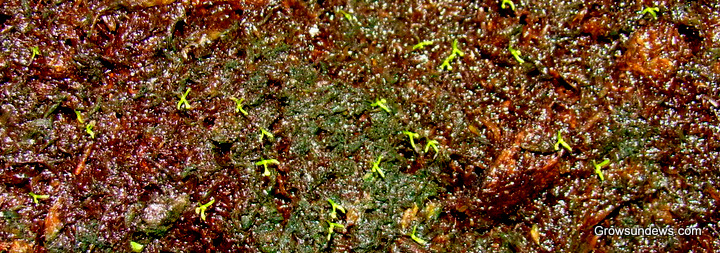
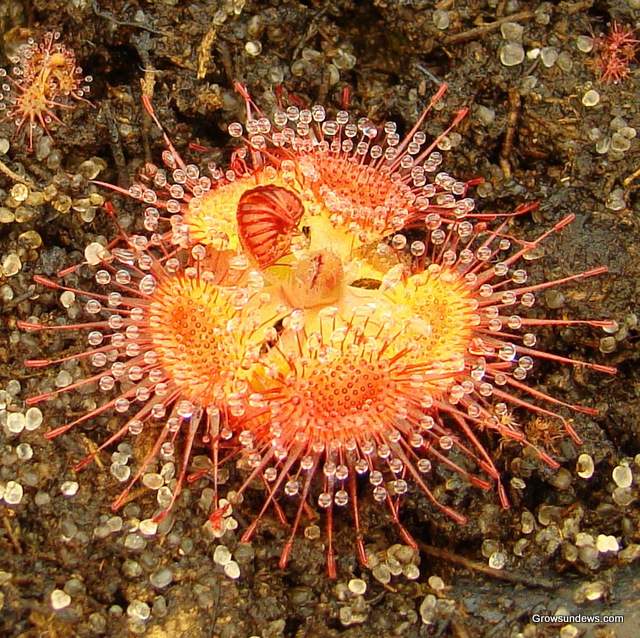
Above: The life cycle of a sundew starts with just one tiny seed.The adult Drosera natalensis above was grown from seed in the top left pic. After 2 years, it has flowered several times, producing thousands of offspring.
The following guide can be used for nearly all tropical and subtropical sundews. These procedures are also used for the temperate sundews, after they've completed the cold stratification process. *For winter-growing sundews, like Drosera glanduligera or tuberous sundews, the following instructions do not apply. These species require a different germination procedure, and sometimes slightly different techniques in order to germinate. Click on the links in the previous sentences to be directed to the appropriate guides.
Setting Up an Area to Germinate and Grow Sundew Seeds
You can germinate your seeds under artificial lights indoors, outdoors, or on a sunny windowsill. I prefer germinating sundew seeds under fluorescent lights, since the conditions are more easily controlled. Choose the option that works best for you.
Below
are some pictures of one of the germination set-ups I made, using
smaller 2-inch tall pots. In the following pictures, I use
long-fibered sphangum moss
because it
has a lower tendency to produce algae and mold, and many Drosera
species seem to thrive in it. It also has less nutrients than peat,
which reduces algae and mold breakouts. The type of moss I used in the
pictures is 100% Better Grow Orchid Moss (dead long-fibered sphagnum
moss) from
Lowes. However, in the past, I've had great success with rinsed
peat:sand mixes, which are generally recommended for most Drosera- especially the South African species.
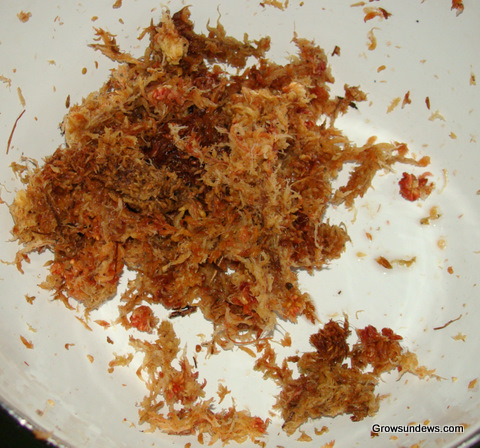
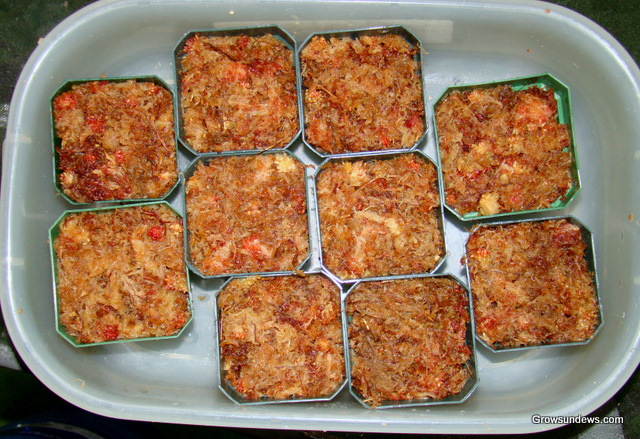
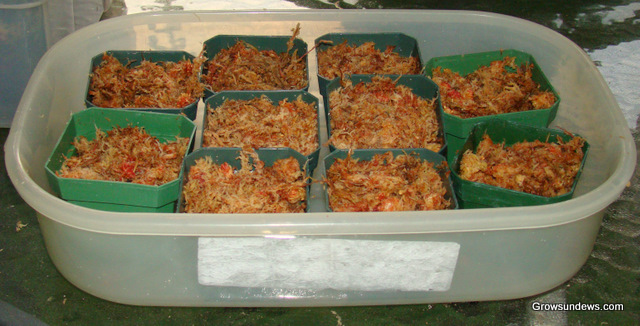
Above left: Long-fibered sphagnum moss (LFS), after being moistened and rinsed.
Above middle and right: The LFS is packed into the 2-inch tall pots, which are ready for the sowing of Drosera seeds.
I
normally try to use a container that extends around one inch above the
top of the
pot. This way, I can place the seedlings as close to the T-8
fluorescent
lights as possible, while still leaving room for the seedlings to grow.
I try to place the lights as close as possible over the germination
container so that the seedlings will grow as quickly as possible.
Taller tubs can be used, but the closer the seedlings are to your
lights, the faster they will develop healthy coloration and growth. If
your lights produce enough heat to boost temps over 75 degrees F, a
germination heat mat won't be necessary.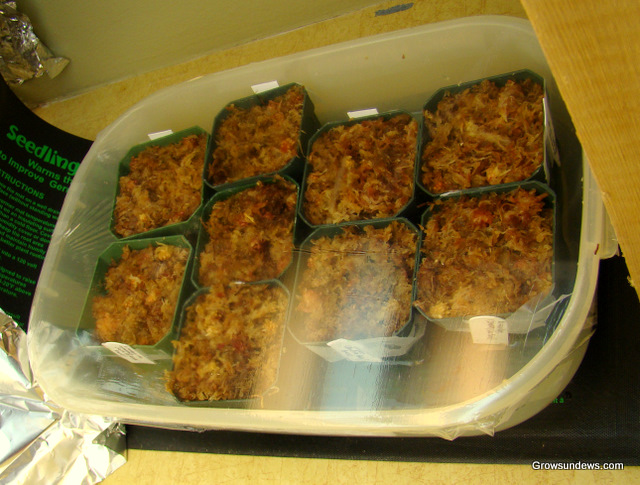
Above left:
Saran wrap was secured with tape over the container to raise the
humidity and keep in the moisture while I was out of town for a month.
Above right:
If you have rinsed your media well, you can provide a higher water level
for your Drosera seeds without any risk of damp-off or mold. I
kept the water level around 1/4- 1/2-inches high (a bit excessive when
using 2-inch pots) with good success. After the seedlings grow
larger, I reduce the water level in the tray, since
the LFS is very absorbant and the saran does an excellent job at
boosting the humidity. Maintain a water level that will ensure the seedlings will not dry out.
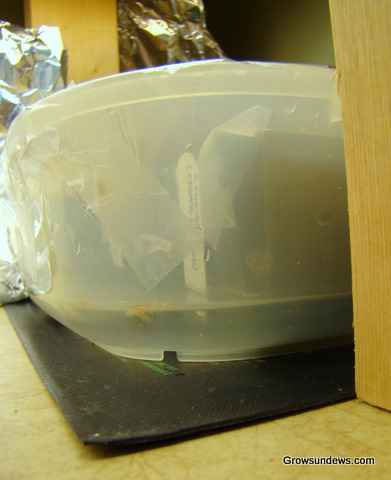
In the last 2 pictures above, you can see the seedling heat mat underneath the
container, which boosts the germination rate dramatically when the
temperature is cooler in my house during the winter. No heat mat is
needed during the warmer months. The mat is a hydrofarm seedling mat,
which cost $20. See the temperature section below for more info.
The
water in the tray should be changed if algae develops. The warmer
temperatures required for germination can encourage algae growth, which
is harmless as long as you don't let your pots sit in it for a long
time.
Drosera Seed Germination Guide
The Essential Steps for Germinating Sundew Seeds
(If cold stratification is
not required, or after you've given the seeds a cold period)
The first thing you should always do is rinse the media you plan to use (i.e. sphagnum peat and silica sand or long-fibered sphagnum). Then, prepare and mix the media you will be using (i.e. 1 part peat to 1 part sand) after following the instructions shown on my sundew cultivation page. Then place the media in the desired pot you want to use. Any pot over 2-inches tall will be fine, but I usually use pots that are 4-inches tall so I don't have to transplant the sundews for a while. Taller pots also allow sundews to grow larger and can help to prevent root sensitivity to water with the more picky Drosera species.
1. Preparing your pots-
Pack down the desired media as much as possible- especially at the
bottom of the pot. This will keep the soil from drying out at the
surface. It also allows you to use a bit less water in the tray, which
can reduce algae and insect breakouts. I've had good success packing
down the top of the media as
well, but this is not necessary. Make sure to thoroughly
rinse the soil mixture first to avoid mold and algae growth. You can use
very small containers if you want to transplant the seedlings after they
germinate, or you can use a larger 3+ pots if you want to avoid having to
transplant them.
2. Sowing your sundew seeds- Sprinkle the seeds on the surface of the soil. I usually gently press my index finger onto some seeds. The seeds will normally stick unless your hand is very dry. Slowly bring your hand over the soil of a pot you've prepared. Then rub your thumb and index finger together, so that some of the seeds fall off of your finger onto the surface of the media. Try to spread the seeds around the entire surface of the pot, avoiding clumping a bunch together. This can sometimes be hard to judge, since the sundew seeds are so tiny. DO NOT BURY THE SEEDS, OR NOTHING WILL GROW! If the seeds are spread out a good distance apart (around a centimeter or further), they will be able to grow larger than if the seeds are clumped. You an also gently separate the seedlings with tweezers if you find that you accidentally clumped them together. If you are planting multiple species in different pots, be sure to get all the seeds off of your fingers before sowing the next species. This can lead to mislabeling and confusion.
3. Final steps- Now you're ready to put the seeded pots in the germination set-up you prepared earlier. Higher humidity seems to aid germination success. To provide a humidity boost, I place my pots in a sterilite container with saran wrap on the top to seal in humidity. You will then want to provide a warm, humid environment for the seeds in order to get the highest germination rates. See the next paragraph or more information about the proper temperature range.
Temperature Range for Germination
Subtropical and tropical sundew seeds have the highest rates of germination when provided with a warm, humid environment. Since it gets pretty cold in my room during the winter, I place a small heat mat partly underneath the sterilite container during the times of the year that temperatures are lower than 75 degrees F in my house. I turn the heat mat on in the day and shut it off at night (it is synchronized with my lights). This creates a perfect balmy environment of 75-80 degrees F in the day for germinating subtropical sundew seeds. The ICPS guide says that 80 degrees is perfect. I've also found the nighttime drop, even as low as 58 degrees F is actually beneficial and seems to aid in germination success. For tropical Drosera, I place the entire mat under the germination container, since these species will do best in temperatures of 85-90+ degrees F.
Once your seeds have germinated...
It can take from less than a week over 2+ months for sundew seeds to germinate, primarily depending on how fresh the seed is (but germination conditions can also affect the speed of germination). Some Drosera species will take much longer to germinate than others. Tuberous species are noted for taking the longest time, sometimes requiring over 3 years of a consistent seasonal cycle until they will germinate!
Your seeds should look like this around 2 weeks after germination:
The above picture shows a group of Drosera capensis seedlings, 2 weeks after germinating. These were
the first batch of sundews I ever grew from seed! Notice the algae and mold
growing in the above picture. At the time, I did not know the benefits of to rinsing sphagnum
peat moss before using it. While the algae is harmless, it can overtake your
sundew seedlings if you're not careful. As I've emphasized all over the place already,
be sure to check out the page
I made about rinsing
your peat and sand before using it ;).
Raising Sundew Seedlings to Maturity
The sundew seedlings will then develop carnivorous leaves soon after germination, and
will then begin the slow process of growing to adulthood. Note that the cotyledons are non-carnivorous. The first true leaves
will usually have small carnivorous traps if conditions are favorable. However, these
carnivorous leaves may not fully develop (under insufficient lighting,
for example). Therefore, the first 4 or more leaves may be
non-carnivorous until the seedling can build up enough energy.
After the plants are large enough, it is usually recommended that you "harden" the seedlings, so that they are able to grow in a less-humid environment. Be sure that the acclimation process is gradual- if you do lower the humidity too quickly, it can sometimes do the seedlings more harm than good! You can harden-off your seedlings by gradually ripping more and more holes in the saran covering your seedling container over a period of a few weeks. If humidity is sufficient in your trays (greater than 40%), you can generally skip this gradual process and move them directly to the new tray.
By hardening-off your seedlings, the leaves become more durable and less susceptible to fungus or disease. The seedlings can then be grown in the same conditions as you would grow the adult sundew of that species. When hardened, you can feed your seedlings larger portions of food than you would be able to unhardened seedlings. There are some growers that have great success with their sundews even though they never harden them--- even for the sundew's entire life, so this is not required- but is recommended undeer most circumstances. I once waited over a year to acclimate my seedlings to lower humidity (when using 100% long-fibered sphagnum for my soil mix), and the seedlings continued to grow very well. The only difference was that I had to make sure to feed them much smaller portions of food to avoid mold, which caused them to grow a bit slower than the hardened seedlings.
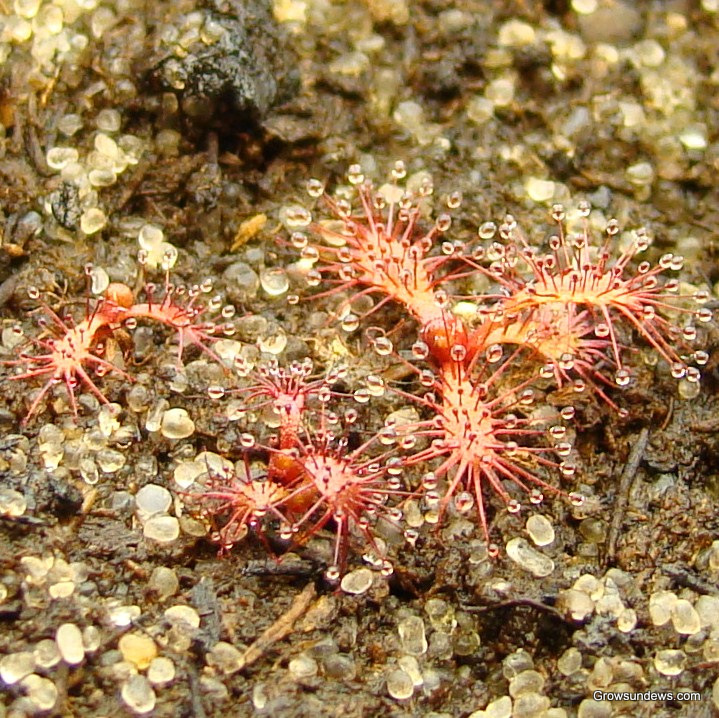
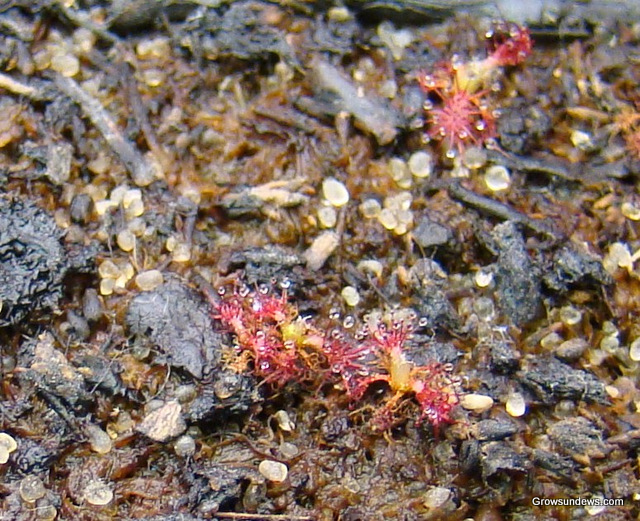
Young Drosera ascendens seedlings Drosera burmannii seedling, after 2 months
If you decided to go the route of planting the seeds in a
small pot or container...
You can transplant your sundew seedlings into a larger pot right after they
first sprout- or you can leave them in the pot (if it is 2 inches or larger),
and wait to transplant it until it reaches maturity. Some species that I've
written about can actually do quite well in smaller pots for their entire life
including D. anglica, D. burmannii, D. capillaris, D. intermedia, and D.
spatulata, among many others. When transplanting young seedlings, use
tweezers or a toothpick when transferring them and be VERY careful not to
disturb the roots or leaves, since this may cause the death or the severe
setback of the seedling.
An interesting fact is that some species like D. burmannii can even be germinated successfully if completely submerged or floating in water, even in dim lighting- so this can be another option for you, if you want to try it. I usually like using microcentrifuge tubes. Once the seedlings germinate, you can pour the seedlings/water combo directly onto the media, or carefully tweezer the seedlings to where you want to plant them.
Speeding up the Growth of Your Seedlings
Once your sundew seedlings have several tiny carnivorous leaves (which can take from only a few weeks to a month after germination), you can speed up their growth dramatically by feeding them extremely small bits of food (see below for a size reference). Technically, when you see the first carnivorous leaf on your sundew, you could begin feeding your seedlings, but it is generally recommended to "play it safe" and wait until the seedling has at least 3 or 4 carnivorous leaves, in case mold breaks out from feeding.
Food Choices
I use Beta pellets (fish food pellets), but other sundew growers tear apart freeze-dried bloodworms, fruit flies, or other small insects into tiny pieces with tweezers. Springtails can sometimes start growing in seedling pots, and you won't have to feed them at all! I wouldn't usually advise trying to get springtails to grow in your pots, though...
Check out my sundew
feeding page for more feeding options.
Preparing
the Food and Feeding Drosera Seedlings
First, crush the pellets into a fine powder, using a rolling pin or other heavy
object. You can also use a mortar and pestle.
General food size rule for sundew seedlings:
The food particle should be about the same size as the largest dew
droplet on the tentacles of the leaf you're trying to feed. You should
be able to safely feed 1 to 2 particles of this size to a single leaf.
If the food is small enough, I try to feed food partlces that are 1/4
to 1/2 the size of a dew droplet to multiple tentacles, but this can
become tedious. If your seedlings are hardened, a larger portion of food can be safely used. Also, some species, like D. burmannii are capable of handling more food than other Drosera species.
The feeding technique: See my youtube video to get a better idea of what I'm trying to describe below (keep in mind the video demonstrates this technique on larger plantlets).
Pick up a "food dust" particle with tweezers by touching the tweezers to it, or scraping it onto the edge of the tweezer. I usually like to pour some food powder into my hand first, which makes this a bit easier. Gently coax a food particle onto one or several combined dew droplets on the tentacles of your sundew seedling's carnivorous leaves. The food should stick to the dew, as demonstrated in the above youtube video. If you don't make sure that the food is touching the dew, the leaf will not be able to sense that the food is there. Mold will develop, and this will cause more harm than good!
It can sometimes be hard to fathom how small of an amount of food I'm referring to when feeding the tiniest of seedlings---it is occasionally difficult for me to see the tiny speck of food that I'm trying to use, but I always like to play it on the safe side ;).
Once
the seedlings start to grow larger, you can continue using food
particles that are the same size of the dew droplets on your leaf (this
amount should continue to increase as the seedlings grow). If you have
time to monitor
mold growth, you can experiment with feeding the seedlings larger
amounts of
food to determine the "food capacity" that your seedlings can
handle.
What to Expect after Feeding Sundew Seedlings
You will then have to wait around 2 weeks to see noticeable growth, but after
this time, you should notice larger leaves have unfurled. You may also observe new leaf buds forming at the crown of your Drosera.
I would
recommend feeding the sundew seedlings once every 2 weeks (or longer if
your
seedlings are not getting very much light). If you do this
faithfully, you can have flowering sundews in even 4 months or less for
some species like Drosera
tokaiensis or Drosera
intermedia 'Cuba'!
***Be sure to check often for mold.
If you overfeed your sundews and
there are food particles left on the leaf that the seedling was unable
to break down and absorb, mold may develop. The sooner you remove the
mold, the better. Carfully remove moldy food with
tweezers. Some growers use isopropyl alcohol to kill the mold, by
gently rubbing a cue-tip dipped in alcohol onto the affected area, but
I haven't had to do this yet. ***
The Cold Stratification Process
For Germinating Seeds of Temperate Drosera species
Temperate Drosera species that require cold stratification:
D.
arcturi, D. anglica, D. filiformis (not
the “Florida All-Red” form), D. intermedia, D. linearis,
D. rotundifolia, and D. stenopetala. D.
binata does not need cold stratification if the seeds are fresh- but
if the seeds are older, a cold treatment will greatly increase the germination
rate.
You have several options to choose from when giving seeds cold stratification:
Option 1: Sowing seeds directly on your soil mix and placing the
pots in plastic bags in the refrigerator for the duration of cold stratification.
Prepare the
desired soil mix that you would use to grow the adult sundew in (i.e. a
1:1
peat:sand mix or 100% long-fibered sphagnum). I'd recommend using dead
long-fibered sphagnum if you can get a brand with nice quality (such as
New Zealand LFS or Better Grow Orchid Moss from Lowes) Lightly moisten
the soil mixture
so that it isn’t soaking, but make sure that it will provide the seeds
with
sufficient moisture. Sprinkle seeds on surface, and place the pot in a
plastic Ziploc bag. You can place multiple pots in a tub or tray to
ensure that the pots aren't disturbed for the next month. Leave
in the refridgerator for your preferred duration of cold
stratification. Be careful
to monitor mold- Mold can develop from a combination of temperature, moisture level
of the soil, and nutrient content of peat. It is very
important to rinse
your peat and LFS before using it
when using it for cold stratification-
especially sphagnum peat!!! The warmer the temperature of your
refrigerator, the more likely it is that mold will develop. Be sure to
check the soil regularly
for signs of mold- if you don’t remove mold right away, it can
eventually take
over the surface of the pot and your seeds will be destroyed. Try to
carefully remove the mold without removing any seeds. Once the cold
period is complete, then you can grow your seeds as described above.
Option
2: Placing seeds inside of a Moist Paper Towel in a Ziploc bag.
Part1- Moisten a paper towel. Sprinkle your Drosera seeds on the towel- It is easiest if you clump them all in the same place, but try to remove chaff or debris first (since mold could develop and ruin the whole clump of seeds). Place the moist paper towel inside a Ziploc bag. Leave in fridge for the desired period of cold stratification.
Part 2- Prepare your desired media.
Then pick up the sundew seeds with tweezers or a toothpick and place them on
the surface of the media you've prepared. This part is not fun, since the seeds can get stuck in the paper towel,
but there is considerably less of a risk for mold. Clumping the seeds together substantially
speeds up this process. Then germinate the seeds as described above.
Option
3 (my favorite): Submerge or float seeds in a small amount of water. Microcentrifuge
tubes work best for this method.
Step 1: Using microcentrifuge tubes (EASIEST): place
your sundew seeds inside of the tube and add less than 1 milliliter of water to
the tube. Shake up the tube to mix the seeds around, and place the tube in the
refrigerator (in a place that you’ll be able to find it again- these tubes are
really small!).
Step 1: Using a very small plastic container, tiny Dixie cup, or
a shot glass: Pour a small amount of distilled water into the container.
Mix your sundew seeds into the water (try to submerge them in the water- this
is not possible sometimes). Seal cup or object w/ saran wrap and tape the saran
tightly so that no water is able to escape, and so that the seeds won’t become
displaced on the side of the cup.
Part 2 (All following steps apply to both methods): Leave the Drosera seeds in the refrigerator for the duration of cold stratification. Try to set up a spot in the fridge where the container with seeds won’t be disturbed or knocked over.
Part 3: Prepare your desired soil/media mixture- I usually prefer using a long-fibered sphagnum (LFS) mix, since LFS quickly absorbs water. LFS also makes it easier to see where the seeds end up when using higher quality moss (ie Better Grow Orchid Moss from Lowes).
Part 4: Suck up the seeds into a
pipette or eyedropper. I usually try to minimize the volume of water I use, but
if you’re careful about gradually releasing the water and seeds, this isn’t
necessary.
Gently and
slowly drop the water/seed mixture onto the top of your media mix. Hold the
pipette close to the level of the surface of the soil (you can even touch the
surface with the pipette, if you want). This will minimize the amount of seeds
that get buried below the surface.
If some
seeds stick to the side of the tube or container, you can add a bit more water
and run the water over the seeds with the pipette until it becomes dislodged.
If it would be easier, use tweezers or a toothpick to collect the stragglers.
Part 5: Germinate the seeds as described above for subtropical or tropical Drosera.
Option 3 works best when you use the smallest amount of water possible that is able to submerge, or come in contact with all the seeds. Otherwise, it can be hard to suck up individual seeds in a large volume of water. If you have too much water in the container you’re using, you can try to carefully remove excess liquid from the container with your pipette first- then suck up the seeds as you normally would.
Option 4- Natural Cold Stratification Outdoors: Some growers sprinkle seeds onto
their pots in the fall and then leave the pots outside for the winter months. The seeds are able to
get a natural cold stratification by using this method. This has worked notably well for growers in areas that have
milder winter temperatures. However, keep in mind that seeds from sundews like Drosera arcturi or Drosera rotundifolia can grow in northern areas that can get extremely
cold during the winter. While the frigid temperatures can be extremely
unfavorable, the thick layer of snow in these regions helps to insulate the
seeds from the extremely cold temperatures. So if you want to try this, place the pot with seeds in a sheltered area-
perhaps even in a Ziploc bag under a pile of leaves or mulch, if necessary.
If you have a mini bog, you can sow your seeds directly onto the soil of the bog in the fall. If you have plenty of seeds, you can mulch the bog without worrying about whether or not you'll lose any seeds in the mulching process. However, if you only have a few sundew seeds, it would be best to germinate your seeds in pots first, and then transfer them to the mini bog later, once your sundews are established.
I did not have success with cold stratification when I first tried it, but it becomes much easier once you learn from your mistakes! When I first started, I frequently had mold breakouts, so hopefully this guide will help you avoid this problem. However, sometimes the seed will not germinate even if you've done everything perfectly. This usually happens when the seed is old and is no longer viable--- this factor is largely out of your control, so don't let this discourage you, and keep trying!
GOOD LUCK!The Biology Behind Cold Stratification
In case you’re interested in the actual
biological/physiological processes behind cold stratification, here is an
explanation that is fairly easy to understand: (simplified version)
Temperate
plant species have evolved mechanisms that ensure their seeds will
germinate at the appropriate time of the year. As an example, consider
a plant of Drosera rotundifolia, growing in a Canadian peat bog (D. rotundifolia is a temperate species of Drosera).
If ripe seed falls from a dried flower stalk of D. rotundifolia at the
end of the summer, there are normally abscisic acids present in the
seed that prevent germination at this time (I will explain what
abscisic acids are in a moment). However, consider what would happen if
there was not a mechanism to prevent germination of these seeds from
occuring--- the seeds would probably grow into plants around the
size of a dime by the time cooler temperatures set in after about 1-2
months of growing. Next, the small D. rotundifolia
seedlings would stop active growth and go into dormancy, forming
hibernacula. However, the smaller plants would have had little time to
build up enough carbohydrates and reserves to get it through the long
Canadian winter. Many of the small plants would deplete their energy
stores and die. This is not a good survival strategy!
Abscisic acids normally act to inhibit the germination-stimulating responses of gibberellins naturally present in the seed. Through a complex process, the cold period gradually decreases the level of abscisic acids present in the seed. Eventually, abscisic acid levels drop below a threshold and the gibberellins are then able to promote production of “germination enzymes,” which are able to break down the stored carbohydrates (starch) and fatty acids present in the seed. This provides the embryo of the seed with food. The embryo is then able to grow and germinate.
By preventing germination right after ripening, temperate plants are able to adapt to unfavorable climates, allowing the seed to germinate at the time that is most likely to allow the offspring to grow to adulthood and survive in the long-term.
Reference: Taiz, Lincoln, Zeiger, Eduardo. Plant Physiology, 5th Edition.
Above: old D. binata seeds germinated after only one week when given 3 weeks of cold stratification.
Storing Sundew Seeds
If you don't have time to plant your sundew seeds right ater they ripen, or after you receive them in the mail, you can store them in the refrigerator. According to Triffid Nurseries, the ideal temperature is from 3-4 degrees Celcius (about 37-40 degrees F). While the temperature does not have to be exact, cooler temperatures can allow most of your sundew seeds to remain viable for up to 10 years or more. It has also been reported on the CPUK forum that a Drosera grower harvested some Drosera spatulata seeds and left them in his hiking jacket in warm temperatures for a year or more. He was worried the seeds would be inviable after that time, but he ended up having great germination success. Goes to show you how tough sundew seeds can be.
Additional Questions or Suggestions?
Contact me at: sundewman(at)yahoo.com