On this website I would like to share with you my experiences in the culture of tuberous Drosera. I will talk about pots and potting, watering, planting a.s.o.
All the herein mentioned periods, in which should be sowed, potted, repotted and harvested are related to the northern hemisphere (see also: How to adapt tubers from the Southern to the Northern Hemisphere).
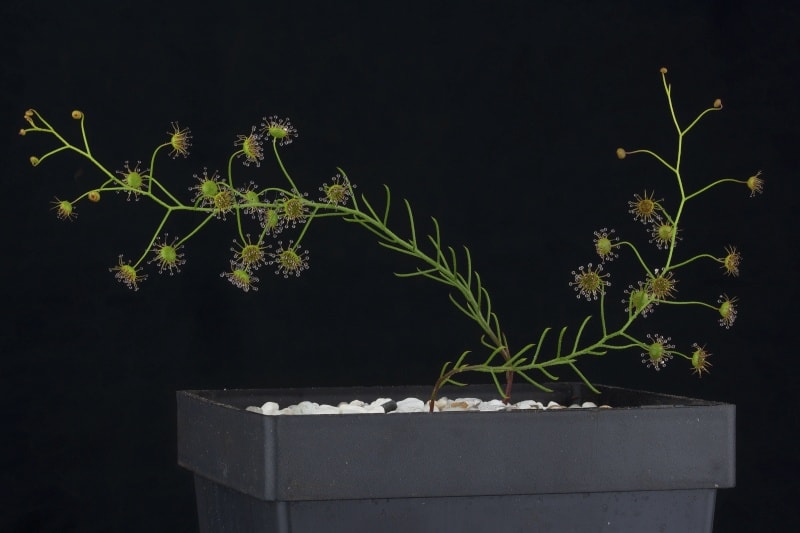
Drosera prophylla
The right time
The right time to plant tubers is at the beginning of the season in autumn or when a stolon is formed at the tuber. A stolon is a subterranean shoot that grows to the surface and at the top of the stolon the plant is formed.
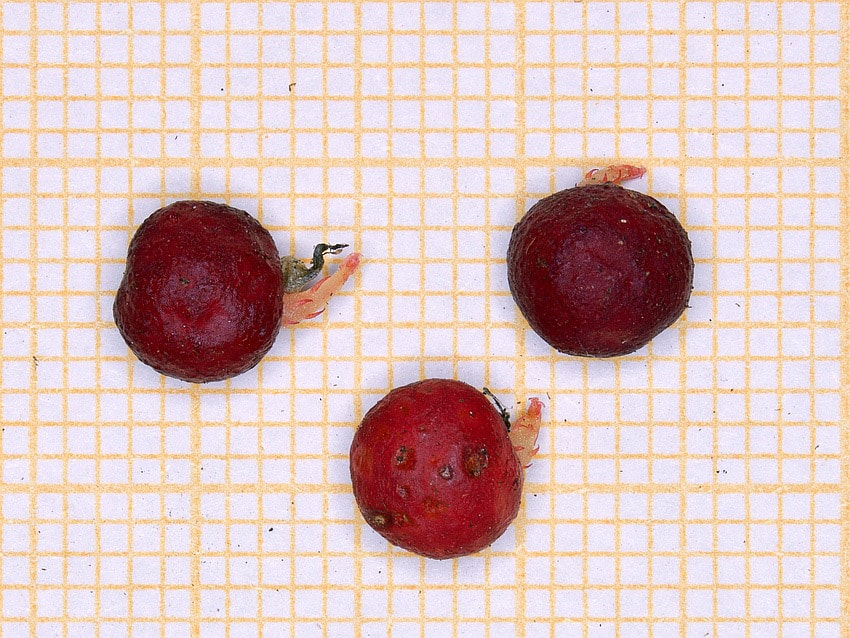
Tubers of Drosera modesta ready for planting
Pot Height - Use Tall Pots
In the literature, it is commonly mentioned that tuberous Drosera need tall pots. This is very true for adult plants. The height should be at least 10 cm (4") better 20 cm (8"). In my experience, 20 cm (8") height works very well for almost all tuberous Drosera.
I can only strongly recommend to use such high pots for several reasons. Some species form the tubers very deep in the pot and some species even so deep that the roots grow out of the bottom of the pot. This happened to me, for example, with Drosera rupicola. Especially when the pots are standing close to each other you might not see that and the tubers that are formed outside the pot either dry up or, if the pots are still watered, they lie in the water, which is not good at all.
But there are two much more important reasons for high pots:
It is still sometimes to be read that one should keep the pots completely dry. In my opinion this is wrong. The plants retreat just to avoid the dryness and dehydration, so the pots should always be slightly to very slightly moist inside the pot. When the pots are no longer watered they dry out, this is a natural process but they shouldt not dry out completely. The more the pots are warm and the smaller they are, the faster they dry out and especially when you have sown, the tiny tubers are not yet so deep in the substrate and dry out faster and die at the end. The higher the pots, the less chance there is that the pots will dry out completely and that a residual moisture will remain inside of them. In the many years, that I grow tuberous drosera, this was one of the two main causes why I have lost tubers in summer.
Another reason is related to the watering of the pots. All my pots stand in tubs and are watered from below by the tray method. So most of the time they stand about 1 - 2 cm (0.4 to 0.8") high in the water. More about this later. Especially older plants of some species form the tubers very deep in the pot and in the times I used 10 cm (8") deep pots I had losses, because the tubers were apparently standing in the water at the beginning of the ponding, which is again not good at all. To change this, I was going to change all pots from 10 cm high to 20 cm high. I started this in 2016 and those who were already in the higher pots have all (at least so far) come back very well. This was the second main cause I lost tubers and it is very annoying when you lose several or all very rare tubers of one species at once as it happened to me with a very rare Drosera bulbosa with location.
The tuberous Drosera don’t require wide pots as long as they don’t form large rosettes (such as Drosera magna) or if there are too many plants in the pot.

Hmmmm ... maybe I should do something about this pot with Drosera abberans.
Preparing the Appropriate Soil for Tuberous Drosera
Tuberous Drosera generally require a loose, sandy substrate. I grow nearly all my tuberous Drosera in a mix of one part sieved peat to one or two parts white silica sand (with a grain size of 1 to 5 mm). If you do not want to sieve the peat in order to obtain the finer powder, try to collect some that is not too fibrous. Sometimes the addition of perlite and vermiculite is recommended, but my plants grow well without them. White silica sand (or light colored) is recommended for older plants. When you are looking for small secondary tubers, or tubers of plants which you just raised from seeds, the sand color becomes important. When I first started planting my tuberous Drosera, I used sand that consisted of small green, red, white, beige, brown, black opak and transparent grains. While this coloration is nice for an aquarium, it is a pain if you are looking for small tubers! Even in white sand is very difficult to find white tubers if they have nearly the same size than the sand grains.
Black sand
For years I used black colored sand instead of white for the sowing of the tuberous Drosera in order to find the small white tubers better.
This black sand was especially for aquariums and it was written, that it is colorfast and have no influence on the hardness of the water and the pH-value (value for the acidity or basicity of an aqueous solution). The size of the grains was 1 to 2 mm (0.04 to 0.1’’).
I sowed 10 different species in a mixture of 1:1 peat to sand. Additionally I potted some species of which I had so many tuber that I have to make at least two pots in 1:1 peat to black sand (D. stolinifera, D. rupicola, D. erythrorhiza ssp. collina, D. moorei and more).
Between the pots with white aquarium sand, which I usually use, and the pots with black sand I have not noticed any differences in growth, health of the plants or tuber yield and did not see any deposits. Of course I can not say if I would get more mini-tubers in the "normal" mixture. However, the yield has been good.
Now to what I wanted, namely to find the white mini tubers better. I must say that I'm highly pleased. Here is an image that everyone who has ever dug tubers, knows or a similar:
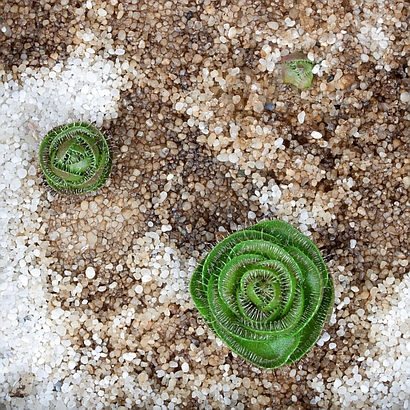
That are tubers of Drosera gigantea in the white sand-peat mixture. Because of the colour you can recognize them more or less well
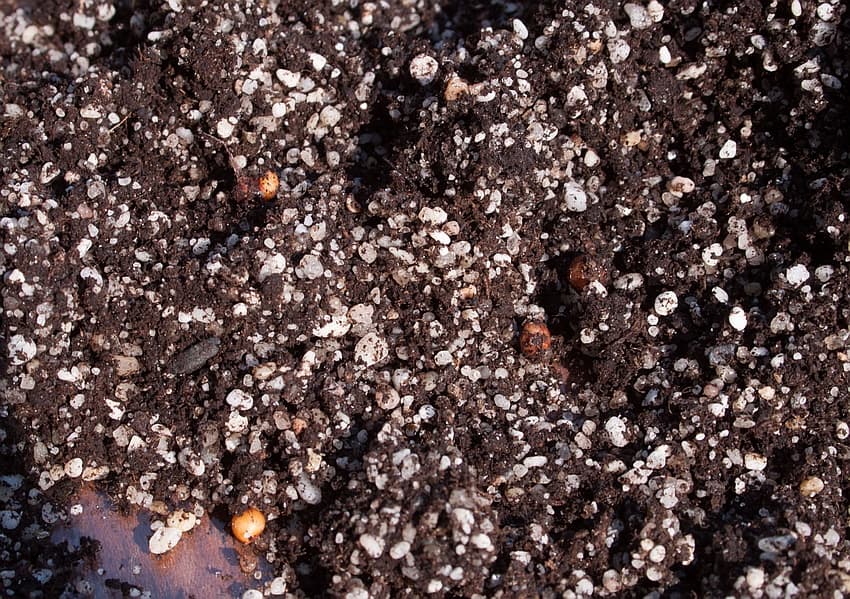
Drosera gigantea tubers in a standard mixture of peat and white sand/gravel
Here is a picture of tubers of Drosera planchonii tubers which I grow from seeds. After three quarters of a year 16 cute, white tiny tubers developed, all about 1 to 2 mm (0.04 to 0.1").
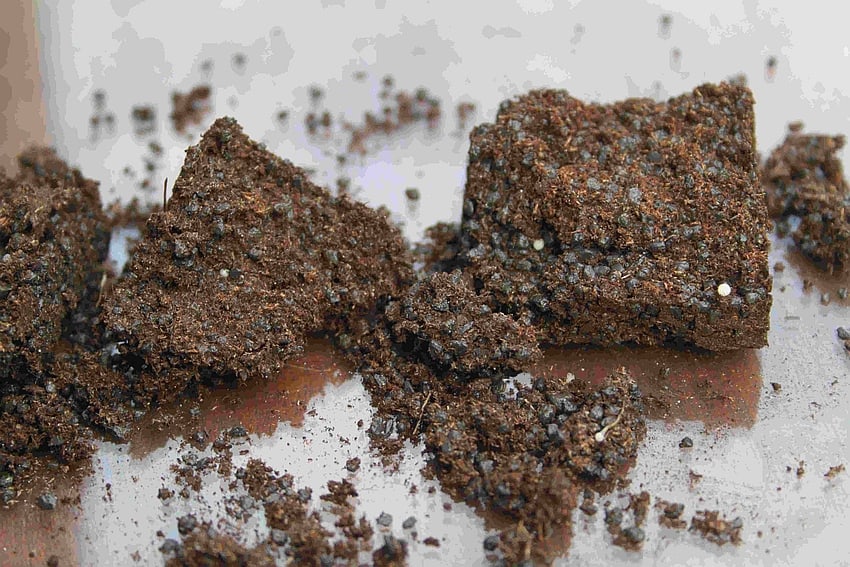
Drosera planchonii tubers in a black sand mixture
You see that the tubers are clearly visible. Just imagine this tiny tubers in the upper image!
My conclusion: The black, artificially colored sand seems just as good as the white sand. However, it has the disadvantage that it is more expensive than the natural white sand.
The discovery of small tubers, especially the white ones, is much easier than if you used white sand and it is also psychoactive! It has a calming effect, because you no longer have the bad feeling that somewhere in the pile there are still some small tubers which you have forgotten.
Toppings
Usually on the surface of the substrate sooner or later moss and/or algae will grow. Some people like this and some people not. When I pot tubers I used for the top 1 to 2 cm (0.4" to 0.8") of the more or less white gravel because of the light is better reflected and therefore the roots are kept cooler and algae, moss etc. are discouraged, or will grow more slowly.
White silica sand seems to be a nice topping. First the silica sand is purely white and it does look great but later the sand will become more or less brown because of the peat. That is absolutely harmless but it does not look nice. As an alternative you can use crushed lava rock or more coarse gravel. The coarse gravel is my favorite topping as you will see in the gallery.
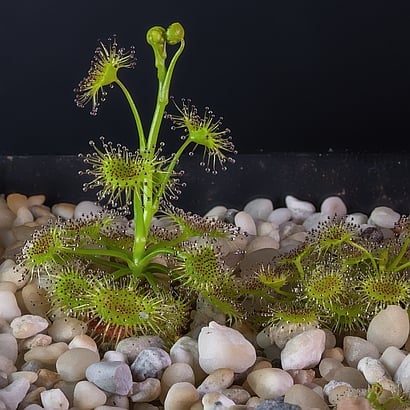
Drosera zomaria
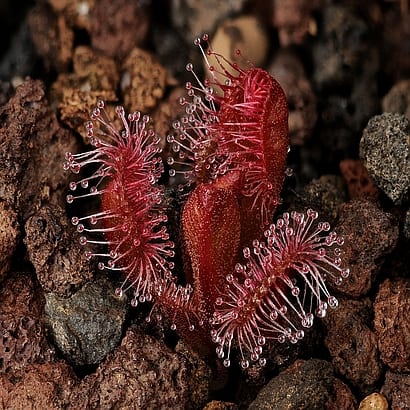
Drosera hookeri
Drosera abberans
Preparing the Soil
Sand/Gravel:
Most Drosera are very sensitive to lime. For this reason, it must be ensured that the sand and/or gravel is absolutely lime-free. You can test this very easily by putting concentrated vinegar in a glass and putting the sand or stones into it. If bubbles are formed than the stones contained lime and they are absolutely not suitable for Drosera. Do not try to use them because of the money. You will kill your plants! I always use white lime-free aquarium sand with 0,5 to 2,0 mm (0.2 to 0.8") and I do not use any other admits. Wash the sand before you use. That's a little bit time comsuming but imagine there is something wrong and all your plants die!
Peat:
The other essential ingredient is peat. The peat should always be unfertilized. This is very important, as fertilised peat is also sold for the better growth of balcony or garden plants. A fertilized peat would also kill your plants relatively quickly. The peat should also not be too fibrous. Peat with a degree of decomposition of about H2 - H5 is best. I always sieve the peat through a 5 mm sieve to get the larger fibres out. The sieved peat can then be mixed more easily with the sand/gravel, but this is not absolutely necessary.
Water:
The quality of the water that you want to use for preparing the medium and also later for watering is also very important. In normal tap water there is always lime and in the most cases it is unsuitable for Drosera. Many people who buy carnivores for the first time kill then in the first two weeks. In most cases this is due to the fact that they water them with tap water.
I only use rainwater, which is always free of lime. I also know people who use small reverse osmosis systems to make the tap water lime-free. You can also buy distilled water in the supermarket (which is almost always reverse osmosis water) and mix this 9:1 (9 parts distilled water and a part tap water) but if you have several plants it will be expensive in the long run.
At first I put the peat in rain-water for about an hour or more until it has soaked up and turned from brown to completely black. Then I wring out the peat as well as possible so that it is only very slightly damp. Then I mix the peat with the sand/gravel so that a homogeneous mass is formed, which I then fill into the pots and press on lightly.
An important question is in what condition the tuber is that I want to pot and in what time the annual cycle of the tuber is. If it is not the time for the tuber to sprout, for instance in summer, then the medium should be almost completely dry. In this case, for example, the moistened peat can be mixed 1:1 with dry peat. If the tuber shlouldt be potted at a time when it is time for it to sprout or even a stolon is present, the medium can be slightly moist. However, it must not be wet in any case. The medium may only be moist or wet if you want to repot seedlings or plants that have already formed roots.
For all my tuberous Drosera I use the tray method to water them.
Planting the Tubers
Tubers have an eye! From that eye the tuber will start to grow and if the tuber didn’t build a stolon by the time you want to pot it, then this eye should be potted facing up. If not, the tuber will still grow, but the new stolon have to grow around the tuber in order to reach the surface, wasting energy and nutrients. Planting the tuber in the right direction is somewhat challenging. I use a tweezers, but you have to avoid pressing the tubers too much in the process.
When the tuber is positioned correctly in the hole, fill the hole in the case that the tuber have a stolon with pure sand otherwise with loose media. Don’t press the sand down, let it only trickle into the whole, so that the new stolon will not be damaged and can easily grow towards the surface.
Tuber of Drosera palladia with eye
Let them grow
Now you can put the pot somewhere. If you potted tubers, which already started to grow, then put for instance with a pipette a few drops of water onto the sandy hole. If the tubers you potted did not have stolons, don’t water the pot at this stage. The residual moisture in the pot will be enough for the tuber. Until the stolon reaches the surface, the pot will not need light.
When the first green part of the plant is seen emerging from the soil, put it somewhere that suits the recommended growing conditions and start to water it. I used to adapt them slowly to more water by watering a little from the surface of the soil at first. Several days later, I used more and more water until after about two or three weeks, they were standing permanently in the water about 1 to 2 cm (0.4 to 0.8") deep. Until the growing period is over.
Game over
When the plants show the first signs that they want to retreat, i.e. when the first leaves turn brown, I move the pots to another tub. The pots in this second tub are only watered once a week. If there is any water left in the tub after one day, I will take it off. Then it was too much water and next time I only take about half of it. The amount of water I put into the tub is constantly reduced and when all above-ground parts are dried the pot is put away for summer. The watering depends of course very much on the environmental conditions, since the plants at this time mostly already stand outside. If it is very warm I give a little more water, if it has rained or it is cooler then less.
Taking the tubers out of the pot
The important question is if the tubers shouldt be taken out of the pot or not. I recommend to leave the tubers in the pots if you don't want to trade or repot the tubers. When you take the tubers out of the pots, you always can miss smaller tubers, which are sometimes almost indistinguishable from sand grains, and thus losing them. Some species leave behind a kind of channel from the dead stolon, in which they can work their way up again more easily next year. This is the way nature intended it for this species, and if you take it away from the plant, it is certainly not to its advantage. Also it is e.g. with Drosera platypoda in such a way that straight at this "channel" small daughter tubers are formed.
If you want to take them out the right time is about two or three months after all the aboveground parts of the plant became brown and dry. This is usually in May to July. Then the media should be nearly dry. Raise the pot a little to feel the weight. If it is dry it’s much lighter. Turn the pot around so that the media comes out. Carefully tear the media into 2 chunks. Usually you will see the first tubers, because it seems that the media prefers to break at the parts where the tubers are.
Now a very difficult part starts, the tuber search. You have to crumble all the media and look carefully for small tubers. If you have a species that has dark red tubers, you are lucky. If the tubers are white, the little ones will look just like the sand grains. It is a good idea to orient yourself with the dried parts of the plant and then follow them until you hopefully find a tuber. If you start hunting for tubers too early, the formation of the primary and secondary tubers will not be complete and the roots will still be white and thick. If you disturb the plant in this condition, it’s usually not possible to “re-pot” it. In this case, treat the whole tuber-root like a normal tuber and hope that the tuber-development process will continue. If you don’t break the root in the process, it will usually work out just fine.
If you dug out the tubers, separate them from bigger clumps in order to avoid rotting-- but do not try to separate them forcefully. This can cause damage to the tubers. Some tubers form a papery cover, which are the remains of the former tuber. This is to protect the tuber and should not be removed.If the papery cover falls apart, then it will usually still be alright.
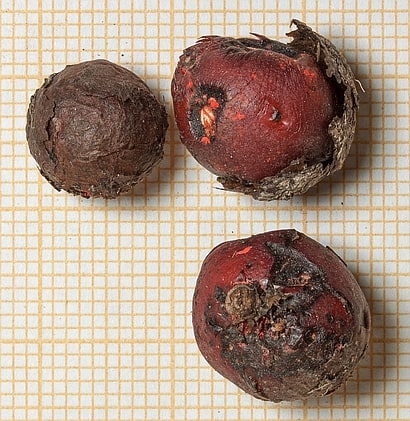
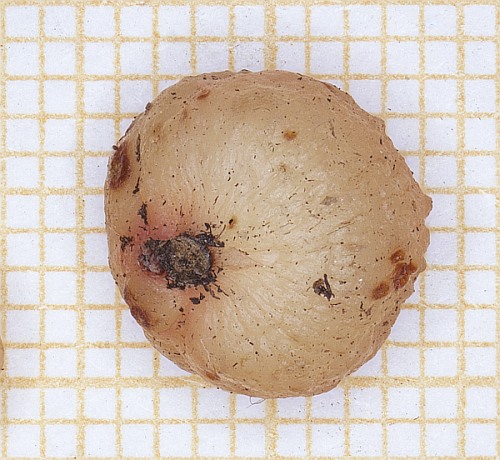
Drosera aff.bulbosa El Caballo Blanco form tuber
Some tuberous Drosera build tubers above the ground from the leaves like some clones of Drosera gigantea, which is a normal behavior and some are building tubers on the surface which is probably because the pot is too small.
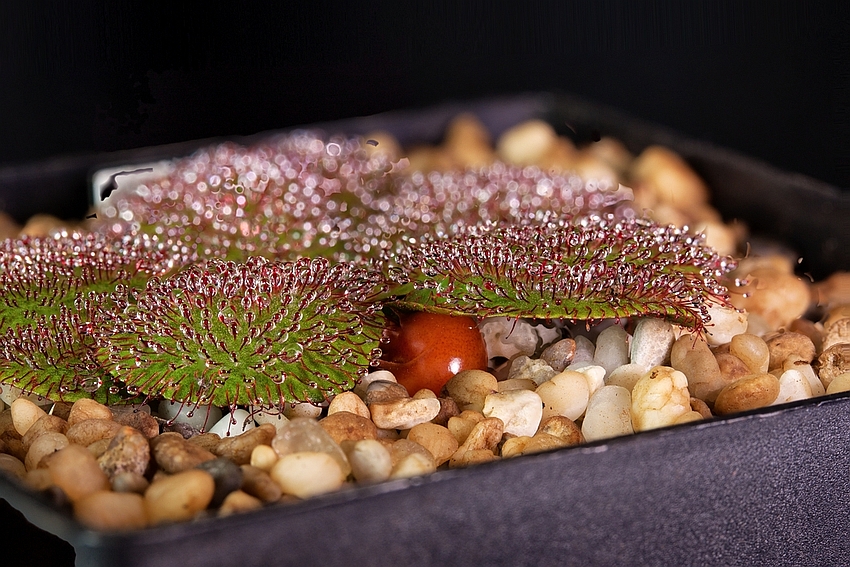
Drosera rosulata gigant swamp form with a subterran tuber
Storing the Tubers During the Summer
If I do not want to plant the tubers in other pots or sell or exchange some tubers, I always leave the tubers in the pots.
If I tokk them out of the pots Ieep them in closed containers. Plastic zip bags or small plastic containers work very well. Do not forget to label the bags- or better, put the plant label into the plastic zip bag.
Store them at about 20 to 25 °C (70 to 75 °F) and put some very slightly moist medium into the bag. I usually take some of the media from the ground of the pot, about 5 time the volume of the tubers.
Check the tubers from time to time (weekly to monthly) in order to see whether they are drying out, rotting or start to sprout.
Only in very rare cases problems occur. If they are drying out then you can put a well squeezed-out piece of moist spagnum moss into the bag. in order to rehydrate the tuber. I've made this some times and in one case, when I controlled the bag, mould developed and already had overgrown the tuber. In the end, the tuber did not survive. In other cases it works well. So be very careful. If you will do this than I recommend to sterilize the sphagnum before use, maybe by treating it in the microwave oven. OK, that's not a sterilization, but it surely will reduce the microbiological contamination. Alternatively, you can re-pot the tuber into nearly dry substrate.